
File an expense claim
Capture a receipt, enter an amount, submit.
Open the Expense hub
Tap the Expense tab at the bottom of the screen.
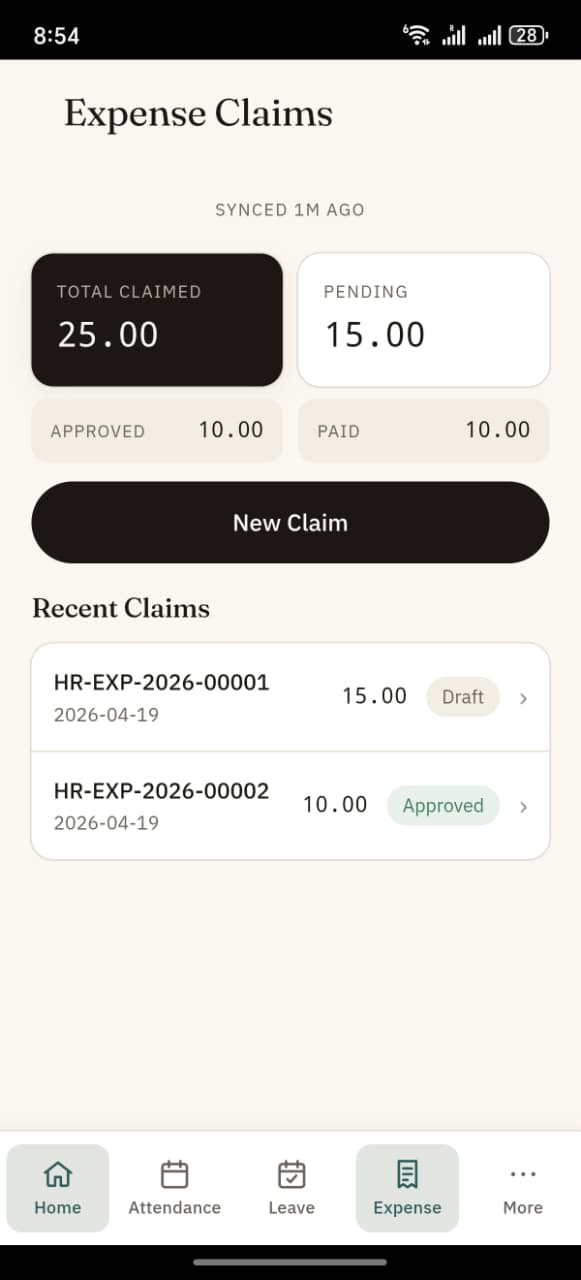
The hub shows:
- Total Claimed and Pending — your all-time totals
- Approved and Paid — smaller tiles for amounts already processed
- "New Claim" — big button to start a new submission
- Recent Claims — your past submissions with status badges
Making a new claim
- Tap New Claim.
- A claim line is shown. Each line is one receipt.
- Fill in:
- Type — pick from the dropdown (Travel, Meals, Supplies, …). The list comes from HR's configured Expense Claim Types.
- Date — the receipt date.
- Amount — the amount from the receipt.
- Description — a one-liner (e.g. "Taxi from airport").
- Receipt — tap the photo slot, take a clear photo of the receipt.
- Add more lines with + Add another line if your claim has multiple receipts.
- The Total at the bottom sums all lines.
- Tap Submit.
Receipt photo — required
Every line needs a receipt photo. If you try to submit without one, you'll see:
Every line needs a receipt photo.
Tap the photo slot on any line missing a receipt, and either:
- Take a new photo with the camera
- Pick from gallery (if your company allows it)
The photo is saved locally first, uploaded to the server when you submit (or on next sync if offline).
After submit
You'll see either:
- "Submitted." — claim created, you can see it in Recent Claims
- "Queued — will submit when online." — saved locally, syncs when network returns
Viewing your claims
Your claims appear in the Recent Claims list at the bottom of the Expense hub.
Each row shows:
- Claim reference (e.g.
HR-EXP-2026-00001) - Posting date
- Total claimed amount
- Status badge — Draft / Pending / Approved / Rejected / Paid
Viewing a claim in detail
Tap any claim row. A bottom sheet slides up with:
- Date — when it was posted
- Status
- Total Claimed
- Approved amount (once HR has approved)
- Line items — each expense with its type, date, amount, and description
Status lifecycle
A typical claim goes through:
- Draft — you just submitted, not yet reviewed
- Pending — with an approver
- Approved — approver signed off; amount may be reduced vs claimed
- Paid — finance has settled the amount
- (Or Rejected — with a reason; see your claim detail for notes)
Common issues
| Message | Cause | Fix |
|---|---|---|
| "Every line needs a receipt photo" | A line is missing a photo | Tap the empty photo slot to add one |
| Validation error on submit | Server rejected (e.g. missing Expense Claim Type config) | Contact HR — they may need to set up the claim type |
| Claim shows in "Sync Errors" | Submission failed on network issue | More → Sync Errors → Retry |